As I already mentioned several times, the biggest problem cruisers have in the Marquesas islands is how to eat all the bananas they have aboard before they go bad. I already wrote a post with many recipes which you can find here.
Since then I found a new excellent use which I am going to share with you. The idea is not mine, I found it in the great book Sailing The Farm.
I will show you how to make your own fruit bars.
I love making them and Rick loves eating them on long passages (if I hide them very well, otherwise they disappear in the first day…).
But before I explain the process, let me give you 6 reasons why you should make your own fruit bars instead of buying them.
- you can make them EXACTLY the way you like them, with or without nuts, chocolate chips, seeds, etc.
- they are much fresher and therefore healthier
- they have no sugar (you may find organic sugarless bars in London or San Diego, but not in the Pacific islands…)
- they are cheap, almost free
- they can be a nice present to take ashore or to another boat
- it’s fun!
INGREDIENTS:
- 10-15 very ripe bananas
- 2 or 3 cups of oats
- 2 limes (juice+zest)
- honey and cinnamon to taste
- 1 cup of sesame seeds
- different types of dried fruit (sultanas, mangoes, papayas…) cut in small pieces
NOTE: This is just one example. But there are infinite other options, depending on your taste and what you happen to have in the galley at the time. Be creative!
- Mix well (I use the blender, but if you don’t have one aboard, just mix very well by hand)
- Cover a tray* with a sheet of grease-proof paper
- Pour some of the mix on the tray and spread it evenly with the back of a spoon, about 4mm thick.
- Put the tray somewhere on deck, where there is plenty of sunshine.
- After several hours under the tropical sun, the mix should be dry enough to be turned over using two trays. (If the sun is not very strong and there is no wind, you may have to wait until the next day, but remember to store it down below overnight.)
- After you turn the mix over, gently peel off the paper.
- When dry enough, cut the mix into bars and let them dry a bit longer.
One day or two of drying should be enough if you plan to eat the fruit bars soon, but if you want to keep them longer, there should be absolutely no moisture trapped inside them.
The result should look more ore less like this:
BON APETTIT!
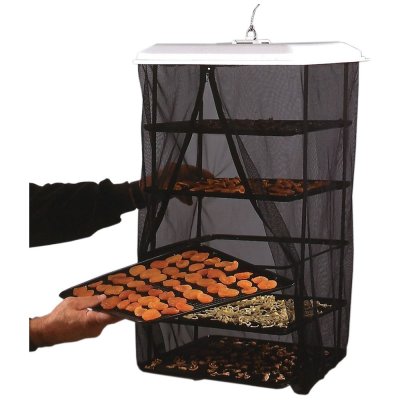
* I use the trays from the dryer, which are perforated and therefore allow plenty of airflow under the mix. If you use normal trays, you may have to turn the bars over more often to dry both sides evenly.


 English
 Slovensko
 Italiano
Awesome!! Very nice recipe. Didn’t try it yet and unfortunately not anymore in the Marquesas but if we return, I will definitely use this. I even have this book ‘sailing the farm’ (can very much recommend it) but I think I need to read it again since I only did this BEFORE cruising and I obviously didn’t recognize back then how useful this simple recipe would be since I don’t even remember having read it. Thanks for sharing ?
Bumped into your website today and like your articles!
Thanks Ilona!
Yes, Sailing the Farm is definitely a book that needs to be re-read on a regular basis. I am glad you liked my recipe, if we meet soon you may even get to sample them ?
I have recipe for a very delicious, simple Irish soda bread, it needs no yeast and is very healthy. You will need 500g of whole grain flour, 20g butter, teaspoon of bicarbonate soda pinch of salt 500mls of butter milk or natural yogurt.
Combine the mixture in a bowl with your hands. Do not over kneed, it is best to have a slightly damp sticky consistency and then dry a little by adding flour . Shape into a disc about 2 inches thick. Place in a hot oven for about 40 min or until well crusted and hollow sounding. This is my wife’s recipe from the Emerald Isle. Great with Tomato paste. A Saint Helenian dish locally known as bread and dance.
Regards
Steve
Thanks Steve… l am going to try that today. I dont think l can face any more white baguettes!
Cheers,
Rick